Showing posts with label Networking. Show all posts

Sunday, March 4, 2012

CABLEING

Hi ,
 first we are going to know basics of networking concepts .

what is network ?
a network is a series of points or nodes interconnected by communication paths. Networks can interconnect with other networks and contain subnetworks.
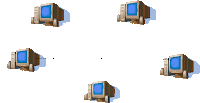
The most common topology or general configurations of networks include the bus, star, token ring, and mesh topologies. Networks can also be characterized in terms of spatial distance as local area networks (LANs), metropolitan area networks (MANs), and wide area networks (WANs).

topologies : 
mesh 
token ring
bus

star


what is networking ?
 communication between the devices or nodes using protocols is called as networking simply by using protocols send/receive data from one node to another node is calles as networking.

Networks may be classified according to a wide variety of characteristics such as the medium used to transport the data, communications protocol used, scale, topology, and organizational scope.
Communications protocols define the rules and data formats for exchanging information in a computer network, and provide the basis for network programming. Well-known communications protocols are Ethernet, a hardware and Link Layer standard that is ubiquitous in local area networks, and the Internet Protocol Suite, which defines a set of protocols for internetworking, i.e. for data communication between multiple networks, as well as host-to-host data transfer, and application-specific data transmission formats.

present we are using 2 types of cables as a media
1.twisted pair cables.
2.unshieled twisted pair.UTP

cross over cable:
for similar devices we are using cross over cable.for example pc-pc,switch-switch etc.
A cross-over cable is a segment of cable that crosses over pins 1&2 and 3&6. This cable is normally used to connect two PCs without the use of a hub, or can be used to cascade two hubs without using an uplink port. Some DSL modems require a crossover calbe to the PC or hub they are connected to. 
 straight through cable :
 For dissimilar  devices straight over cable are using . pc-switch etc

The above tool is called as crimping tool.

UTP :

Cat 5: Out of the three types of cable we’ll be discussing, Category 5 is the most basic. Cat 5 cable is available in two varieties: Unshielded Twisted Pair (UTP), the type widely used in the United States, and Screened Twisted Pair (SCTP), which has shielding to provide a measure of extra protection against interference, but is rarely used outside of Europe. Cables belonging to Category 5 are either solid or stranded: Solid Cat 5 is more rigid, and the better choice if data needs to be transmitted over a long distance, while Stranded Cat 5 is very flexible and most likely to be used as patch cable. Cat 5 cable can support 10, 100, or 1000 Mbit/s Ethernet. The 1000BASE-T standard for Gigabit Ethernet over UTP was designed to work over up to 100 meters of plain old Cat 5.
Cat 5e: Cat 5e (which stands for Category 5, enhanced) cable goes along the same lines as basic Cat 5, except that it fulfills higher standards of data transmission. While Cat 5 is common in existing cabling systems, Category 5e has almost entirely replaced it in new installations. Just like Cat 5, Cat 5e can handle data transfer at 1000 Mbit/s, and is suitable for Gigabit Ethernet. Cat 5e experiences much lower levels of near-end crosstalk (NEXT) than Cat 5.
Cat 6: Of the three cable categories we’re discussing, Category 6 is the most advanced and provides the best performance. Just like Cat 5 and Cat 5e, Category 6 cable is typically made up of four twisted pairs of copper wire, but its capabilities far exceed those of other cable types because of one particular structural difference: a longitudinal separator. This separator isolates each of the four pairs of twisted wire from the others, which reduces crosstalk, allows for faster data transfer, and gives Category 6 cable twice the bandwidth of Cat 5! Cat 6 cable is ideal for supporting 10 Gigabit Ethernet. Since technology and standards are constantly evolving, Cat 6 is the wisest choice of cable when taking any possible future updates to your network into consideration. Not only is Category 6 cable future-safe, it is also backward-compatible with any previously-existing Cat 5 and Cat 5e cabling found in older installations.

What are the maximum lengths for cables?
For Solid UTP:
Fast Ethernet 100baseT 100 Meters (328 feet)
Twisted Pair Ethernet 10baseT 100 Meters (328 feet)
Recommended maximum lengths for Patch Cables made from stranded cable:
Fast Ethernet 100baseT 10 Meters (33 feet)
Twisted Pair Ethernet 10baseT 10 Meters (33 feet)

                                                     Thanks for reading


Thursday, February 10, 2011

RAID LEVELS

Hi All,

What is RAID? 
In 1987, Patterson, Gibson and Katz at the University of California Berkeley, published a paper entitled "A Case for Redundant Arrays of Inexpensive Disks (RAID)" . This paper described various types of disk arrays, referred to by the acronym RAID. The basic idea of RAID was to combine multiple small, inexpensive disk drives into an array of disk drives which yields performance exceeding that of a Single Large Expensive Drive (SLED). Additionally, this array of drives appears to the computer as a single logical storage unit or drive.

RAID stands for Redundant Array of Independent Disks and it basically involves 
combining two or more drives together to improve the performance and the fault tolerance. 
Combining two or more drives together also offers improved reliability and larger data volume sizes.A RAID distributes the data across several disks and the operating system considers this array as a single disk. 
Using Multiple Hard Drives for Performance and Reliability.

Types of RAID :

RAID 0 - Striping:
It is the Stripped Disk Array with no fault tolerance and it requires at least 2 drives to be implemented. Due to no redundancy feature, RAID 0 is considered to be the lowest ranked RAID level. Striped data mapping technique is implemented for high performance at low cost. 
The I/O performance is also improved as it is loaded across many channels. Regeneration, Rebuilding and functional redundancy are some salient features of RAID 0.

Raid1: Disk mirroring is the basic function occurs.
      1. It creats exact copy of one physical harddisk to another.
      2. It uses one controller
      3. If one drive fails system will boot with other drive.
      4. slow performance.
      5. Increased cost every mirror must be seperate physical device thus you must purchase   twice the storage capacity.
      6. no protection from controller failure.: if controller failure , the mirrored drives as just   inaccessible.

RAID 0+1:
It is the RAID array providing high data transference performance with at least 4 disks needed to implement the RAID 0+1 level. 
It's a unique combination of stripping and mirroring with all the best features of RAID 0 and RAID 1 included such as fast data access and fault tolerance at single drive level. The multiple stripe segments have added high I/O rates to the RAID performance and it is the best solution for maximum reliability.

RAID 2 (ECC):
It is the combination of Inherently Parallel Mapping and Protection RAID array. It's also known as ECC RAID because each data word bit is written to data disk which is verified for correct data or correct disk error when the RAID disk is read. Due to special disk features required, RAID 2 is not very popular among the corporate data storage masses, despite the extremely high data transference rates.

RAID 3:
RAID 3 works on the Parallel Transfer with Parity technique. The least number of disks required to implement the RAID array is 3 disks. 
In the RAID 3, data blocks are striped and written on data drives and then the stripe parity is generated, saved and afterwards used to verify the disk reads. Read and write data transfer rate is very high in RAID 3 array and disk failure causes insignificant effects on the overall performance of the RAID.

RAID 4:
RAID 4 requires a minimum of 3 drives to be implemented. It is composed of independent disks with shared parity to protect the data. Data transaction rate for Read is exceptionally high and highly aggregated. Similarly, the low ratio of parity disks to data disks indicates 
high efficiency.

RAID 5:
RAIDS 5 is Independent Distributed parity block of data disks with a minimum requirement of at least 3 drives to be implemented and N-1 array capacity. It helps in reducing the write inherence found in RAID 4. RAID 5 array offers highest data transaction Read rate, medium data transaction Write rate and good cumulative transfer rate.

Raid 5: Disk stripping with parity.It is completely Software based and higly secured technology.
      1. Raid 5 is in-expensive, but very convinient.
      2.The parity information is stored distributed in different disk .
      3.If one of the disk fails , it is hot swappable.
      4.Parity information is stored in other Harddisk is automatically 
 updated to failed one.
      5.If more than one disk fails, it should be restored from backup.


RAID 6:
RAIDS 6 is Independent Data Disk array with Independent Distributed parity. It is known to be an extension of RAID level 5 with extra fault tolerance and distributed parity scheme added. RAID 6 is the best available RAID array for mission critical applications and data storage needs, though the controller design is very complex and overheads are extremely high.

RAID 7:
RAID 7 is the Optimized Asynchrony array for high I/O and data transfer rates and is considered to be the most manageable RAID controller available. The overall write performance is also known to be 50% to 90% better and improved than the single spindle 
array levels with no extra data transference required for parity handling. RAID 7 is registered as a standard trademark of Storage Computer Corporation.

RAID 10:
RAID 10 is classified as the futuristic RAID controller with extremely high Reliability and performance embedded in a single RAID controller. 
The minimum requirement to form a RAID level 10 controller is 4 data disks. The implementation of RAID 10 is based on a striped array  of RAID 1 array segments, with almost the same fault tolerance level as RAID 1. RAID 10 controllers and arrays are suitable for 
uncompromising availability and extremely high throughput required systems an environment.

With all the significant RAID levels discussed here briefly, another important point to add is that whichever level of RAID is used regular and consistent data backup maintenance using tape storage is must as the regular tape storage is best media to recover from lost data scene.


RAID 1:
RAID 1 uses mirroring to write the data to the drives. It also offers fault tolerance from the disk errors and the array continues to operate efficiently as long as at least one drive is functioning properly.

The trade-off associated with the RAID 1 level is the cost required to purchase the additional disks to store data.

RAID 2:
It uses Hamming Codes for error correction. In RAID 2, the disks are synchronized and they're striped in very small stripes. It requires multiple parity disks.

RAID 3:
This level uses a dedicated parity disk instead of rotated parity stripes and offers improved performance and fault tolerance. 
The benefit of the dedicated parity disk is that the operation continues without parity if the parity drive stops working during the operation.

RAID 4:
It is similar to RAID 3 but it does block-level stripping instead of the byte-level stripping and as a result, a single file can be stored in blocks. RAID 4 allows multiple I/O requests in parallel but the data transfer speed will be less. 
Block level parity is used to perform the error detection.

RAID 5:
RAID 5 uses block-level stripping with distributed parity and it requires all drives but one to be present to operate correctly. 
The reads are calculated from the distributed parity upon the drive failure and the entire array is not destroyed by a single drive failure. 
However, the array will lose some data in the event of the second drive failure.

The above standard RAID levels can be combined together in different ways to create Nested RAID Levels which offer improved performance.
 Some of the known Nested RAID Levels are -

      RAID 0+1
      RAID 1+0
      RAID 3+0
      RAID 0+3
      RAID 10+0
      RAID 5+0
      RAID 6+0

Hardware RAID
  • A conventional Hardware RAID consists of a RAID controller that is installed into the PC or server, and the array drives are connected to it.
  • In high end external intelligent RAID controllers, the RAID controller is removed completely from the system to a separate box. Within the box the RAID controller manages the drives in the array, typically using SCSI, and then presents the logical drives of the array over a standard interface (again, typically a variant of SCSI) to the server using the array.

Software RAID:

In software RAID a software does the work of RAID controller in place of a hardware. Instead of using dedicated hardware controllers or intelligent boxes, we use a particular software that manages and implements RAID array with a system software routine.

Comparing Hardware RAID & Software RAID

      Portability

  • OS Portability

    Software RAID is not usable across operating systems. So you cannot, for example, use two RAID disks configured in Linux with Windows XP and vice versa. This is big issue for dual booting systems where you will either have to provide a non-RAID disk for data sharing between the two operating system or use hardware RAID instead.
    As you know, dual booting is mostly obsolete these days as you can run multiple operating systems on the same machine using virtualization software like vmware & xen.
  • Hardware Portability

    Software RAID
    In Linux you can mirror two disks using RAID-1, including the boot partition. If for any reason the hardware goes bad, you can simply take the harddisk to a different machine and it will just run fine on the new hardware. Also with a RAID-1 array, each of the harddisk will have full copy of the operating system and data, effectively providing you with two backups, each of which can be run from a different hardware.Unfortunately in Windows it is not so easy to switch a operating systrem from one hardware to another, but that is the story of priprietary licenses and we will keep it for another day.
    Hardware RAID 
    Hardware RAID is not so portable. You cannot just swap the hardware to a different machine and hope it will work. You have to find a Motherboard which is compatible with your RAID controller card; otherwise you can kiss your data goodbye. Also there is a bigger issue of problem with the RAID controller itself. If it fails and you cannot get the same controller from the market (and it has probably become obsolete by then), then again you can kiss your data goodbye.

Easy & Speedy Recovery

It may seem trivial but trust me, for a busy and loaded server, an easy and speedy recovery, that too inside the operating system without having to reboot is what one can dream of. Imagine if during the peak hours, your RAID system crashes and you are forced to reboot the machine to make changes to it to restore your data! Software RAID's like in Linux, not only continues working even when the hardware has failed, but also starts restoring the RAID array, should any spare disk be available. All of these happens in the background and without affecting your users. This is where software RAID shines brilliantly.

System Performance

Software RAID uses the CPU to do the work of the RAID controller. This is why high-end hardware RAID controller outperforms software RAID, especially for RAID-5, because it has a high powered dedicated processor. However for low end hardware RAID, the difference may be neglible to non-existent. In fact it is possible for the software RAID perform better than low end hardware RAID controller simply because today's desktop's and workstations are powered by very powerful processors and the task is trivial to them.

Support for RAID Standards

High-end Hardware RAID may be slightly more versatile than Software RAID in support for various RAID levels. Software RAID is normally support levels 0, 1, 5 and 10 (which is a combination of RAID 0 and RAID 1) whereas many Hardware RAID controller can also support esoteric RAID levels such as RAID 3 or RAID 1+0. But frankly who uses them?

Cost

This is where software RAID again scores over hardware RAID. Software RAID is free. Hardware RAID is moderate to high priced and can put a strain on your budget if deployed widely.
But over the years the cost of hardware RAID has come down exponentially. So it may not be too far when more affordable RAID-5 cards will be built-in on newer motherboards.

Future Proof

Gone are the days when we could associate software RAIDs with bugs and OS problems. Nowadays software RAIDs are almost flawless. We are using software RAID in linux operating system for several years and haven't experienced any problem whatsoever. On the contrary, hardware RAID has a single point of failure and that is its hardware controller. If it crashes then your only option is to find another equivalent RAID controller from the market; by this time the model may become obsolete and you may not even find anything compatible. You are as such faced with the haunting prospect of losing all your data, should the RAID controller fail. Software RAID will never become obsolete and will continue to get updated with updated versions of your operating system.

Why Use RAID? Benefits and Costs, Tradeoffs and Limitations
RAID offers many advantages over the use of single hard disks, but it is clearly not for everyone. The potential for increased capacity, performance and reliability are attractive, but they come with real costs. Nothing in life is free. In this section I take an overview look at RAID, to help explain its benefits, costs, tradeoffs and limitations. This should give you a better idea if RAID is for you, and help you to understand what RAID can do--and what it can't do.
As you read on, it's essential to keep in mind that with RAID, it's definitely the case that "the devil is in the details". Most common blanket statements made about RAID like "RAID improves availability" or "RAID is for companies that need fast database service" or "RAID level 5 is better than RAID level 0" are only true at best part of the time. In almost every case, it depends. Usually, what RAID is and what it does for you depends on what type you choose and how you implement and manage it. For example, for some applications RAID 5 is better than RAID 0; for others, RAID 0 is vastly superior to RAID 5! There are situations where a RAID design, hardware and software that would normally result in high reliability could result instead in disaster if they are not properly controlled.

RAID Benefits
Alright, let's take a look at the good stuff first. :^) RAID really does offer a wealth of significant advantages that would be attractive to almost any serious PC user . (Unfortunately, there are still those pesky costs ,tradeoffs  and limitations  to be dealt with... :^) ) The degree that you realize the various benefits below does depend on the exact type of RAID that is set up and how you do it, but you are always going to get some combination of the following:
Higher Data Security: Through the use of redundancy, most RAID levels provide protection for the data stored on the array. This means that the data on the array can withstand even the complete failure of one hard disk (or sometimes more) without any data loss, and without requiring any data to be restored from backup. This security feature is a key benefit of RAID and probably the aspect that drives the creation of more RAID arrays than any other. All RAID levels  provide some degree of data protection , depending on the exact implementation, except RAID level 0 .

Fault Tolerance: RAID implementations that include redundancy provide 
a much more reliable overall storage subsystem than can be achieved by a single disk. 
This means there is a lower chance of the storage subsystem as a whole failing 
due to hardware failures. (At the same time though, the added hardware used in 
RAID means the chances of having a hardware problem of some sort 
with an individual component, even if it doesn't take down the storage subsystem, is increased

Improved Availability: Availability refers to access to data. Good RAID systems improve availability both by providing fault tolerance and by providing special features that allow for recovery from hardware faults without disruption. 

Increased, Integrated Capacity: By turning a number of smaller drives into a larger array, 
you add their capacity together (though a percentage of total capacity is lost to overhead or 
redundancy in most implementations). This facilitates applications that require large
 amounts of contiguous disk space, and also makes disk space management simpler. 
Let's suppose you need 300 GB of space for a large database. Unfortunately, no hard disk 
manufacturer makes a drive nearly that large. You could put five 72 GB drives into the system,
 but then you'd have to find some way to split the database into five pieces, and you'd be 
stuck with trying to remember what was were. Instead, you could set up a RAID 0 array 
containing those five 72 GB hard disks; this will appear to the operating system as a single,
 360 GB hard disk! All RAID implementations provide this "combining" benefit, though the 
ones that include redundancy of course "waste" some of the space on that redundant information.

Improved Performance: Last, but certainly not least, RAID systems improve performance by allowing  the controller to exploit the capabilities of multiple hard disks to get around performance-limiting mechanical issues that plague individual hard disks. Different RAID implementations improve performance in different ways and to different degrees, but all improve it in some way.

Wednesday, January 5, 2011

Solaris Backup and Restore with ufsdump :- Some useful options

Hi All,

1. Backing up to a file:

root@host #  ufsdump -0f /admin/backup/etc.dump /etc
  DUMP: Date of this level 0 dump: Mon Jul 05 16:41:36 2010
  DUMP: Date of last level 0 dump: the epoch
  DUMP: Dumping /dev/rdsk/c1t0d0s0 (cat:/) to /admin/backup/etc.dump.
  DUMP: Mapping (Pass I) [regular files]
  DUMP: Mapping (Pass II) [directories]
  DUMP: Writing 32 Kilobyte records
  DUMP: Estimated 148290 blocks (72.41MB).
  DUMP: Dumping (Pass III) [directories]
  DUMP: Dumping (Pass IV) [regular files]
  DUMP: 147902 blocks (72.22MB) on 1 volume at 8136 KB/sec
  DUMP: DUMP IS DONE


2. Restoring data from backup file.

For non interactive (this will restore everything) restore:-

ufsrestore -xvf /admin/backup/etc.dump
for interactive restore:-
ufsrestore -ivf /admin/backup/etc.dump
Here is the proceedure to restore single file named hosts.090610 only.
 ufsrestore -ivf /admin/backup/etc.dump

root@host # ufsrestore -ivf etc.dump
Verify volume and initialize maps
Media block size is 126
Dump   date: Mon Jul 05 16:41:36 2010
Dumped from: the epoch
Level 0 dump of a partial file system on cat:/etc
Label: none
Extract directories from tape
Initialize symbol table.
ufsrestore >
ufsrestore > cd /etc
ufsrestore > ls hosts*
   1378  hosts
   5795  hosts.090610
ufsrestore >
ufsrestore > add hosts.090610
Warning: ./etc: File exists
ufsrestore > extract
Extract requested files
You have not read any volumes yet.
Unless you know which volume your file(s) are on you should start
with the last volume and work towards the first.
Specify next volume #: 1
extract file ./etc/hosts.090610
Add links
Set directory mode, owner, and times.
set owner/mode for '.'? [yn] y
Directories already exist, set modes anyway? [yn] y

3. Copying the contents of a directory to another directory including symbolic links. This is useful when you want to migrate data to new mount point or different path.

Here, all the data /etc will be copied to /admin/backup/etc.

root@host #mkdir /admin/backup/etc
root@host# ufsdump -0f  - /etc|(cd /admin/backup/etc;ufsrestore -xvf -).

Just before this command finish, it may prompt for setting ownership, it must be answered as yes.

After complete above command, if  you found that its restored using relative path, you can just use mv command to move the data.

For instance, if the restoration happend /admin/backup/etc/etc, you do a mv *  /admin/backup/etc/etc/* /admin/backup/etc.

Friday, October 29, 2010

China makes fastest supercomputer

Hi All,
A research lab in China has made the fastest supercomputer in the world. With this, it has been able to replace US in having the hold on this segment of technology.

But as China is trying to realize its dream of becoming the best in hi-tech, US has asked it to control its demand in rare earth elements. These elements are used in many a high-technology applications and have been in great demand by China.
It's 1.4 times more faster than present Us supercomputer........

Saturday, October 23, 2010

Secure Sockets Layer (SSL) ?

Hi All,

Now a days You might have heard some times that not to give your password or credit card information or any other sensitive information on public computers or on Msn, yahoo etc chats.The reason why you might have heard that the Hackers have some ways to you would have probably heard that hackers have a way to steal your your credit card numbers , passwords etc.

A hacker can use different types of attacks such as Packet sniffing or ARP Poisoning to steal your sensitive information
 Secure Sockets Layer (SSL) is the most widely used technology for creating a secure communication between the web client and the web server. You must be familiar with http:// protocol and https:// protocol, You might be wondering what they mean. HTTP protocol is used for standard communication between the Web server and the client. HTTPS is used for a secure communication.Now a days banks and for online money transactions etc are using .


Cryptography

If two users want to have a secure communication they can also use cryptography to accomplish it.


For example:

TFDVSF=Encrypted Text

SECURE= Decrypted Text

You might be wondering how i Decrypted it, Here i have used Algorithm=+ for the communication and the key is "1", What comes after S is T so as you can see that S is converted into T, What comes After E is F to letter E from the word secure if converted into F and so on, To help you understand this more better I am adding a Video

So If the hacker starts sniffing from between he will get Encrypted text and as the Hacker does not know the keys so he cant decrypt it, but if the attacker or hacker is sniffing from the starting point so he will get the key and can easily Decrypt the data

Standard Communication VS Secure communication
Suppose there exists two communication parties A (client) and B (server)

Standard communication(HTTP)


When A will send information to B it will be in unencrypted manner, this is acceptable if A is not sharing Confidential information, but if A is sending sensitive information say "Password" it will also be in unencrypted form, If a hacker starts sniffing the communication so he will get the password.This scenario is illustrated using the following figure


Secure communication(HTTPS)


In a secure communication i.e. HTTPS the conversation between A and B happens to be in a safe tunnel, The information which a user A sends to B will be in encrypted form so even if a hacker gets unauthorized access to the conversion he will receive the encrypted password (“xz54p6kd“) and not the original password.This scenario is illustrated using the following figure


How is HTTPS implemented?

A HTTPS protocol can be implemented by using Secure Sockets Layer (SSL), A website can implement HTTPS by purchasing SSL certificate.

How to identify a Secure Connection?

In your browser, you will see a lock icon Picture of the Lock icon in the Security Status bar.  You can click the lock to view the identity of the website.

If you are making an online transaction through Credit card or any other means you should check if https:// secured communication is enabled.

Friday, October 22, 2010

Assigning IPV6 in different OS

Hi All,

Now a days the internet user's are growing and the ip addresses are decreasing .so ipv4 is a limited ip addresses to assign .In ipv6 there is no limit to assign ip add and here mac add of the user are included .the header of the IPV6 we can observe in the below figure.


Windows 

Check
First check to see if IPv6 is installed.
  • Execute ipv6 if from a DOS windows.
  • If it returns the message below, then IPv6 is not installed. If it returns a large amount of interface configuration information, IPv6 is installed and you can proceed to the Configure section.
Could not access IPv6 protocol stack-the stack is not installed.
 
 
Install
To install IPv6 on Windows XP SP2, execute the following commands as a administrator from the command line (DOS window):
  • ipv6 install
  • The output from this command is likely to be 1 of 2 possibilities:’
  1. The command returns OK. IPv6 has installed correctly, proceed to the Configure section.
  2. The command returns
Installing...
Failed to complete the action.
Error 0x800704b8
This problem relates to a windows internal security database that needs to be integrity checked and possibly repaired. ** If you’re using a corporate machine that is built as part of a Windows Domain, then please check with your IS people before following these procedures, as they may alter or erase Group Policy settings that have been pushed to your machine via a Domain Controller.**
  • If you issue esentutl /g c:\windows\security\Database\secedit.sdb, this will check the security database for errors.
Check the output of that command, if it declares…
Checking database integrity.
The database is not up-to-date. This operation may find that this database 
is corruptbecause data from the log files has yet to be placed in the database.
  • …then the database has errors which need to be corrected before IPv6 can be installed. The following command will rebuild the Local Security database on the machine.
** THIS IS POTENTIALLY DAMAGING TO YOUR DOMAIN SETTINGS **
  • Execute “esentutl /p c:\windows\security\Database\secedit.sdb” as an Administrator user.
  • You will likely get a warning box pop up which states…
You should only run Repair on damaged or corrupted databases
  • …Hit “OK”
  • Once the command has run-trough, re-execute esentutl /g c:\windows\security\Database\secedit.sdb which should result in the following output
Integrity check successful.
Operation completed successfully in some seconds.
  • Now, you should be able to execute the ipv6 install command successfully.
  • Run ipv6 if to confirm (see above).
Configure
Once IPv6 is Installed and running, it’s time to assign IPv6 Addresses, gateways and routes.
To configure an IPv6 address, determine which of the Interfaces shown by the command ipv6 if matches the name of your main network connection under “START–Control Panel–Network Connection”, it should be called something like “Local Area Connection X” where X is a number.
  • As an example, ipv6 if on my machine shows
Interface 5: Ethernet: Local Area Connection
 Guid {3E4601A7-041B-4D5A-ACD3-B6D840BBEF39}
zones: link 5 site 2
uses Neighbor Discovery
uses Router Discovery
link-layer address: 00-16-cb-97-4a-4e
  preferred global 2404:138:4000:1::203, life infinite (manual)
  preferred link-local fe80::216:cbff:fe97:4a4e, life infinite
  multicast interface-local ff01::1, 1 refs, not reportable
  multicast link-local ff02::1, 1 refs, not reportable
  multicast link-local ff02::1:ff97:4a4e, 1 refs, last reporter
  multicast link-local ff02::1:ff00:203, 1 refs, last reporter
link MTU 1500 (true link MTU 1500)
current hop limit 128
reachable time 20000ms (base 30000ms)
retransmission interval 1000ms
DAD transmits 1
default site prefix length 48
  • To assign 2404:138:4000:1::203 to Local Area Connection 5, execute ipv6 adu 5/2404:138:4000:1::203
  • To define the default gateway for that interface, execute ipv6 rtu ::/0 5/2404:138:4000:1::2. This defines the default route (::/0) on interface 5 as being 2404:138:4000:1::2.
  • To check IPv6 routes execute netsh, then interface ipv6 and then show route.
It should show something like
Publish  Type     Met  Prefix                  Idx  Gateway/Interface Name
-------  -------- ----  ---------------------  ---  ---------------------
no       Manual     0     ::/0                   5  2404:138:4000:1::2
  • To get out of netsh, type bye
Finalise
Once you have configured IPv6 Gateway and routes, test you can ping:
  1. Your local loopback. Try ping6 ::1. This should return replies that look similar to a normal IPv4 ping response
  2. Your v6 Gateway. Try ping6 <IPv6 gateway address>. Again, we’re looking for a normal ping response.
If you are having problems pinging gateways, then it may be with the Teredo Tunneling adapter that XP & Vista installs by default. This can be disabled using the netsh command
  • At a DOS prompt, execute netsh
  • Execute interface and then execute ipv6
  • Execute set teredo disable
  • Execute bye to exit from netsh
  • Finally, ensure you have a DNS server configured that can return Ipv6 or AAAA (Quad A) records.

Mac OS X

Configuring a static (manual) IPv6 address under Mac OS X (version 10.5.3 ) should be an easy case of bringing up the Network Preferences window, choosing your preferred interface, clicking on ‘Advanced’ and then choosing the TCIP/IP pane. From this pane, there is an ability to have IPv6 off, automatically configure or manually configure.

We haven’t tried automatic configuration yet [June 2008] as we don’t have an IPv6 DHCP server setup at the office. However, we do support IPv6 – as does KAREN of course – and have an allocation of IPv6 addresses.
Unfortunately, we discovered what appears to be a bug in using the GUI to manually set a static IPv6 address configuration in OS X. Whilst you can fill out the fields in the GUI pan and they are remembered, the underlying network configuration does not appear to change.
A manual workaround has been successful.


  • Ignore the GUI – at least for setting a static address
  • From the terminal, setup your IPv6 details:
    • sudo ifconfig en0 inet6 2404:138:4000:x::xx/64
    • sudo route add -inet6 -prefixlen 0 default 2404:138:4000:x::x
    • (replace en0 with the relevant network interface you want to IPv6 enable and xx with the relevant address numbering for your machine and the default gateway)
  • From the terminal, check the details have been applied
    • ifconfig en0 | grep inet6
inet6 fe80::21f:5bff:fe84:5a2f%en0 prefixlen 64 scopeid 0x4
inet6 2404:138:4000:x::xx prefixlen 64
(note the fe80: address is the internal IPv6 address assigned by the OS. It is similar to a 10.x or 192.168.x address under IPv4)
    • netstat -r -f inet6
Internet6:
Destination        Gateway            Flags      Netif Expire
::                 2404:138:4000:x::x UGSc        en0
default            2404:138:4000:x::x UGSc        en0
Note: As this method does not use the GUI, you may find that as you switch back to other networks using the same interface you will have to reset or manually remove your default gateway.

Linux/Unix

The following instructions were developed using Ubuntu Server 7.10, and is very simple. You need to edit /etc/network/interfaces with an appropriate editor such as vi. The catch is that the following lines need to be added before the IPv4 configuration.
iface eth(n) inet6 static
    address 2404:138:xxxx:xxxx::xxxx (static address of your host)
    netmask 64
    gateway 2404:138:xxxx:xxxx::xxxx (static address of the default router)
Once this has been saved restart the interface and use ping6 <address> to test connectivity to a remote subnet.

Automatic IPv6 address configuration – DHCP v6


Unfortunately, neither Mac OS X, Windows XP, nor most default linux installs come with a DHCPv6 client ). This means that any DNS, default routes and search paths have to be set manually.
This reflects the non-finalised protocols / standards around DHCPv6.


The Internet2 gurus says that one of the challenges is support for IPv6 ‘helpers’ (for example http://www.blackviper.com/WinXP/Services/IPv6_Helper_Service.htm).
Some community DHCP IPv6 links follow:
  • Dibbler – Dibbler is a portable DHCPv6 implementation. It supports stateful ( IPv6 address granting) as well as stateless (option granting) autoconfiguration for IPv6. Supports IPv6 and WinXP.
  • dhcpv6 project – DHCPv6 is a stateful address autoconfiguration protocol for IPv6, a counterpart to IPv6 stateless address autoconfiguration protocol.
  • ISC DHCP suite – version 4 onwards supports DHCPv6
 

Popular Posts

Followers

Disclaimer

All Data and Information Provided on This BLOG is only for Education purposes only.If you done any thing else these in real time the blog is not Responsible.Try all those on your own risk.
IF you find any thing else here as per in violation of copyright law .mail me on srinathceh@gmail.com as soon as possible action will be taken.